You’re dreaming of that iconic photo at Machu Picchu, but the logistics of hiking the Classic Inca Trail feel overwhelming. This guide simplifies everything. It starts with the one critical step you must take up to eight months in advance. Think of Inca Trail permits like front-row tickets to a once-in-a-lifetime concert. They are strictly limited, sell out completely, and you can’t buy one at the door.
To protect this ancient path, the Peruvian government allows only 500 people to begin the trek each day. This number includes all guides, porters, and cooks. In practice, only about 200 spots remain for trekkers like you. This is the biggest reason why learning how to get an Inca Trail permit is crucial. You cannot do it on your own. A government-issued permit is only available through officially licensed Inca Trail tour operators.
So, what does this mean for planning your classic Inca Trail adventure? You need to act early, especially for the dry season from May to August. During these peak months, permits often sell out 8 or even 10 months in advance. Securing your spot with a trusted tour company is the first step to making your journey a reality. It ensures you can walk in the footsteps of the Inca.
Is the Classic Trail Right for You? Salkantay vs. Short Inca Trail
The legendary Classic Inca Trail is famous for a reason, but it’s not the only way to Machu Picchu. Your adventure style, timeline, and fitness level might make another trail a better fit. Understanding the differences helps you choose the right path.
For dramatic mountain wilderness, the Salkantay Trek is spectacular. Often called the “wilder cousin” of the Inca Trail, it traverses high-altitude landscapes dominated by the snow-capped Salkantay Peak instead of the original stone path. This trek is generally more physically demanding than the Classic Trail, but it doesn’t require the hard-to-get permits, offering more flexibility. The trade-off? You miss the historical continuity of walking the sacred Inca highway. Many travelers choose from Salkantay Trek Packages that combine adventure, comfort, and expert guidance for an unforgettable experience.
If you’re short on time or dislike camping for three nights, the Short Inca Trail is perfect. This two-day option covers the final, most beautiful stretch of the Classic Trail. You’ll still arrive at the Sun Gate (Inti Punku). After the hike, you return to Aguas Calientes for a hot shower and a night in a comfortable hotel. Machu Picchu awaits the next morning.
Ultimately, the best hike matches your dream. The Classic Trail offers unmatched historical significance. The Salkantay Trek appeals to those seeking raw alpine scenery and a physical challenge. The Short Inca Trail delivers the iconic finish line without a four-day commitment. Each path leads to the same incredible destination. The journey is yours to choose.
Finding Your Guides: How to Choose the Best Inca Trail Tour Operator
Once you’ve chosen a trail, the most important decision is picking the right tour operator. The Inca Trek cost matters, but the quality of your experience depends on more than price. The best operators keep group sizes small—usually 12 people or fewer. This creates a more intimate, supportive atmosphere on the trail. You won’t feel like just another face in the crowd. Small groups give better access to your guide for questions about Inca history, local plants, or encouragement on a tough climb.
Beyond group size, ethical tourism is a key sign of a company’s quality. Your trek team includes guides and porters—the local professionals who carry food and camping gear. Porters are the backbone of every Classic Trail expedition. A responsible operator provides proper hiking gear, weatherproof tents, nutritious meals, and fair pay for porters. A well-cared-for team is happy and effective, which makes your trek safer and more enjoyable.
To help you vet the best inca trail tour operators, cut through the marketing noise by asking a few direct questions. A great company will be proud to give you clear answers.
- What is your maximum group size? (Smaller is better).
- Can you confirm your porters are provided with proper gear, meals, and fair wages?
- Are your guides certified and trained in first aid and high-altitude safety?
A great operator will guide you on the trail, but your preparation begins long before day one. The biggest challenge for most hikers isn’t the distance, but the elevation.
Beating the Altitude: A Simple Plan to Acclimatize in Cusco
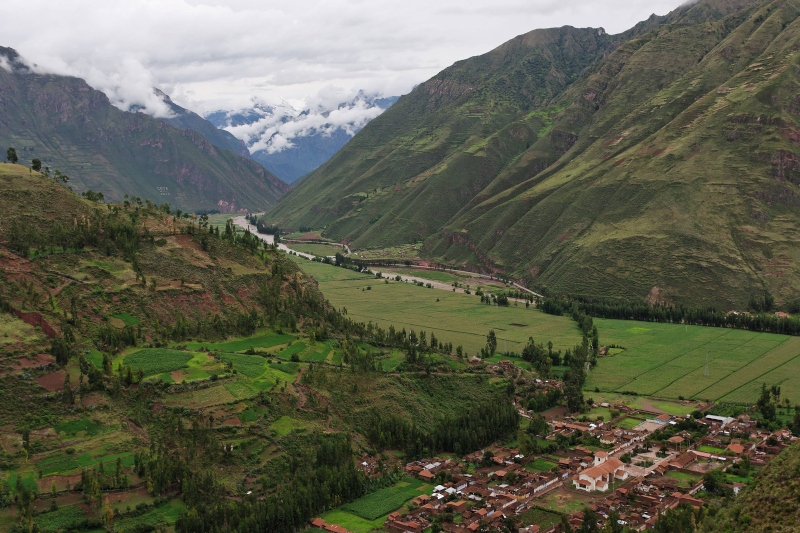
Your journey to the Classic Inca Trail doesn’t start on the path itself, but in historic Cusco, sitting at a dizzying 11,152 feet (3,399 meters). At this height, the air is “thinner,” which means less oxygen with every breath. For your body, it feels like running a race while someone gently pinches your straw. High altitude can cause headaches, fatigue, and nausea. This isn’t about age or fitness—it can affect anyone.
The best way to prevent altitude sickness is to give your body time to adjust. This process is called acclimatization. You need at least two full days in Cusco or Sacred Valley before your trek. Flying straight from sea level and starting the hike the next day is a recipe for a miserable—and potentially unsafe—experience. Think of these two days not as a delay, but as the first and most important stage of your trek.
First Step: Rest and Hydrate
On your first day, take it easy. Don’t try to explore every cobblestone street. Walk slowly, drink plenty of water, and eat light meals. This is also the perfect time to try mate de coca, a traditional herbal tea locals use to ease altitude symptoms. It tastes like mild green tea and is widely available. Listen to your body. A mild headache is common, but rest and hydration are your best friends.
Giving your body time helps it produce more red blood cells to carry oxygen. This greatly increases your chances of a successful and enjoyable hike. Proper acclimatization is more important than any training you can do at home. It changes the answer to the question: “How difficult is the trek?” A well-acclimatized hiker will manage the challenge, while an unacclimatized one will struggle.
How Fit Do You Really Need to Be for the Classic Inca Trail?
When people wonder how difficult is the trek to Machu Picchu, they’re usually asking about fitness. The good news is, you don’t need to be an elite athlete. The Inca Trail is a test of endurance, not speed. Think of it less like a race and more like a series of long, beautiful walks at a very high altitude. The real challenge is your ability to hike for five to eight hours, often up and down steep stone steps, and then wake up the next morning ready to do it all again. It’s about stamina and a resilient mindset, not about being the fastest person on the mountain.
Benchmark Your Fitness
A great benchmark to gauge your readiness is to go for a long walk. If you can hike for 6-8 miles (10-13 km) in a hilly park or nature reserve and end the day feeling tired but not completely exhausted, you have a solid fitness base to build upon. Remember, your guides will set a slow and steady pace—often referred to as “Peruvian flat”—designed to help you conserve energy and manage the altitude. The goal is not to rush to the campsite but to enjoy the incredible scenery and historical sites along the way. This kind of steady, multi-day effort is the core of training for high altitude trekking peru.
To prepare, your best training isn’t in a gym; it’s on hills and stairs. Starting about three months out, find a local trail with inclines or a tall building with plenty of stairs and make them your new best friend. Walking these two or three times a week will build the exact leg muscles and cardio strength needed for the trail’s relentless ups and downs. This focused training will pay off enormously, especially when you face the trail’s biggest single challenge: crossing Dead Woman’s Pass on day two. With this physical preparation handled, you can focus less on your feet and more on the journey itself.
The 4-Day Journey: A Day-by-Day Guide to the Classic Inca Trail
You’ve trained on the hills and prepared for the altitude, but what does the classic Inca Trail 4-day itinerary actually feel like? While every journey is unique, the trail follows a dramatic four-act structure, designed by the Incas themselves to be a transformative pilgrimage. This isn’t just a walk in the mountains; it’s a story that unfolds one step at a time.
Day 1: Settling In and First Impressions
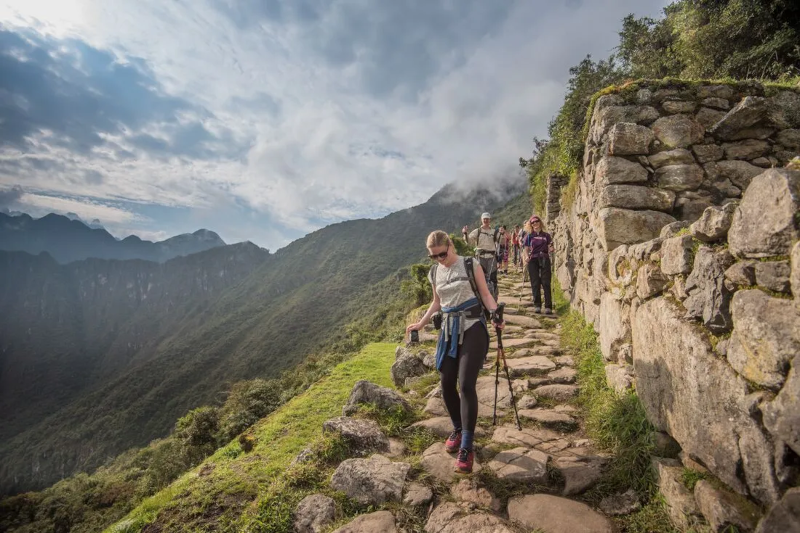
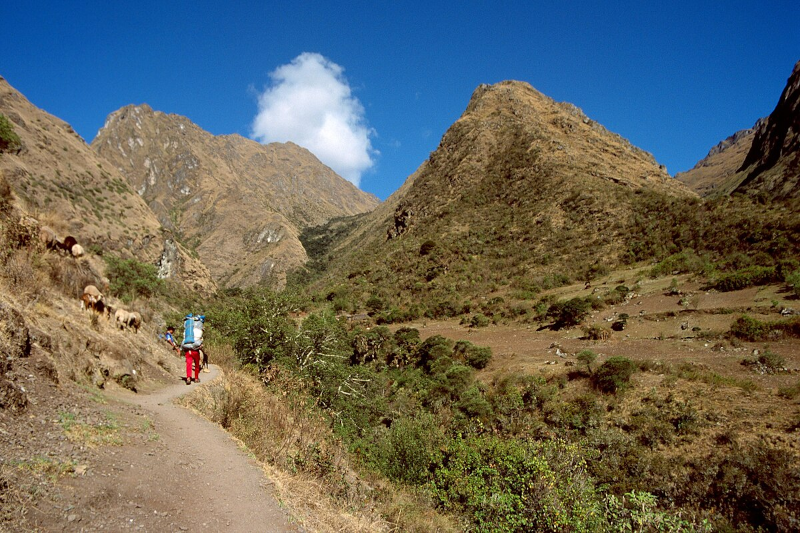
Your first day sets the stage. After crossing a bridge over the Urubamba River, the path is surprisingly gentle, winding through small villages and past local farms. It’s a day for settling in, finding your rhythm, and getting to know your fellow hikers. The real “wow” moment comes when you round a bend and see your first major Inca site, Llactapata. Viewing these sprawling agricultural terraces from across the valley, you begin to grasp the scale of the civilization that built them, turning this from a simple hike into a journey through living history.
Day 2: Conquering Dead Woman’s Pass
The following morning brings the trail’s biggest and most famous test: crossing Dead Woman’s Pass. The name sounds intimidating, but it comes from the shape of the mountain profile, which resembles a reclining woman. The Quechua name, Warmiwañusqa, is what you’ll hear from your guides as you begin the relentless ascent. This is where your training pays off. The climb is slow, steady, and challenging, pushing you to focus on your breathing and the stone steps right in front of you.
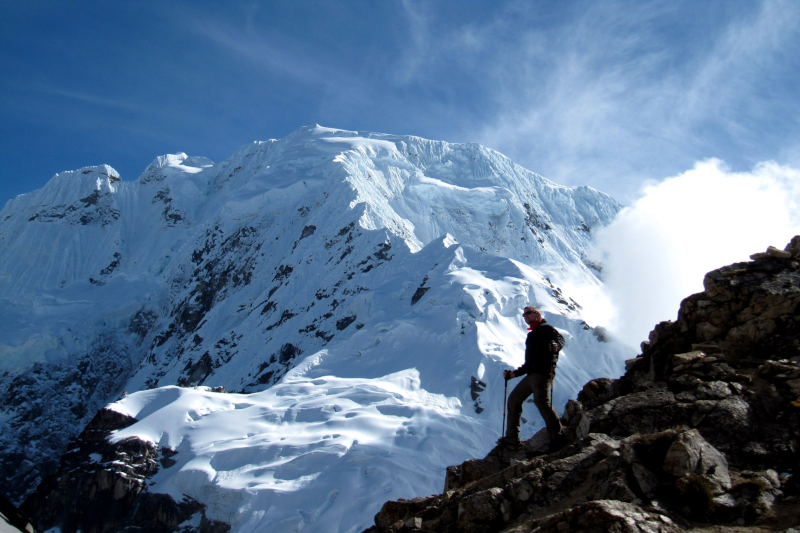
Reaching the summit at 13,828 feet (4,215 meters) is a moment of pure, breathless exhilaration. You’ve conquered the highest point of the trail, and the 360-degree views of the Andes are your reward. After celebrating with your group, a long, knee-testing descent on ancient stone stairs takes you down into the Pacamayo valley, where your campsite awaits. You’ll arrive tired but with an incredible sense of accomplishment, knowing you’ve overcome the trek’s toughest physical challenge.
Day 3: Inca Engineering and Cloud Forest Beauty
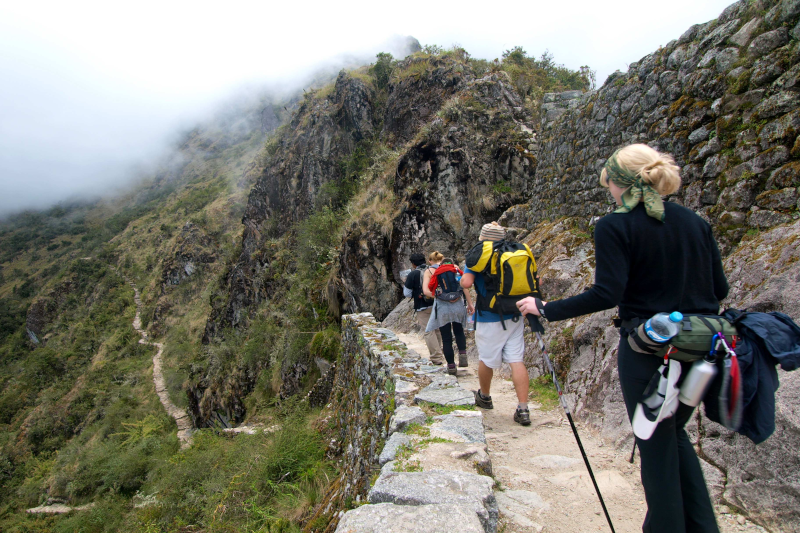
In stark contrast to the grueling effort of day two, your third day is often called the most beautiful and interesting. The path, now made of beautifully preserved original Inca stonework, guides you through lush cloud forests draped in orchids and bromeliads. This section is a historical treasure hunt, as you’ll get to explore multiple fascinating ruins up close. You’ll climb to the circular ruins of Runkurakay, then navigate the remarkable cliff-hugging settlement of Sayacmarca, or “Inaccessible Town,” wondering how anyone managed to build in such a dramatic location.
This part of the journey showcases the genius of Inca engineering. The trail itself becomes a highlight, hugging the mountainside and plunging through hand-carved tunnels. The campsites for this night are often in spectacular locations, with stunning views of the snow-capped Salkantay mountain range. As you watch the sunset paint the peaks gold, you feel a deep connection to the path, understanding it not just as a route, but as a sacred work of art.
Day 4: Sunrise at the Sun Gate and Arrival at Machu Picchu
The final morning begins before sunrise. After a very early, quick breakfast, you hike the last few miles in the pre-dawn darkness with your headlamp, a line of bobbing lights moving in shared anticipation. The destination is Inti Punku, the Sun Gate. This was the original, formal entrance to Machu Picchu for pilgrims on the trail, and its purpose becomes clear in an instant. As you step through the stone gateway, the morning mist below you begins to part, revealing the iconic city of Machu Picchu spread out in the valley below, bathed in the first golden rays of sunlight.
This is the moment. It’s the payoff for every steep step and cold morning. Arriving at the Sun Gate and seeing Machu Picchu from this vantage point is an experience reserved only for those who have walked the path. After taking it all in, you’ll descend into the citadel itself, no longer just a tourist, but a pilgrim who has earned the view. You’ve completed a journey that people have been making for over 500 years.
What Does the Classic Inca Trail Really Cost? A Full Budget Breakdown
The first practical step in turning this dream into reality is understanding the Inca trek cost and budget breakdown. While prices vary, a 4-day classic Inca Trail tour typically falls between $650 and $1,500 USD per person. This might seem like a wide range, but the price difference often reflects the quality of the camping equipment, the guide-to-hiker ratio, and, importantly, the ethical treatment and wages for the porters. The best Inca Trail tour operators tend to be at the higher end, but this cost covers your permit, transportation, a professional guide, all meals on the trail, and the incredible team that carries the equipment.
Beyond the main tour fee, there are a couple of key expenses to plan for. Tipping is a deeply ingrained and appreciated custom on the trail. This is your chance to directly thank the guides, cooks, and porters who work tirelessly to make your journey safe and comfortable. It’s wise to budget an additional $60 to $100 USD per hiker for tips, which is typically pooled and distributed among the crew. Additionally, most tour companies offer gear rentals. A good-quality, warm sleeping bag and a set of trekking poles are essential, and you can usually rent them for about $20 to $40 for the entire trek.
To make it simple, here’s a sample budget to help you plan:
- Tour Cost: $650 – $1,500+ (Includes permits, guide, porters, food, transport)
- Tipping: $60 – $100 (For the guide, porters, and cook)
- Gear Rental: $20 – $40 (For a sleeping bag and trekking poles)
- Personal Expenses: ~$50 (For snacks, water on the first day, and souvenirs)
With your budget now in focus, it’s time to think about what you’ll need to carry on your back.
Your Essential 4-Day Packing List: What to Bring (and What to Leave at Home)
Figuring out what to pack for a 4 day Peru trek can feel daunting, but the secret isn’t more gear—it’s smarter gear. The weather in the Andes is famously unpredictable, shifting from brilliant sunshine to chilly rain in an instant. Your best strategy is to dress like an onion, using a simple layering system that lets you adapt on the fly. Think of it in three parts: a sweat-wicking base layer (like a synthetic t-shirt), an insulating mid-layer (a cozy fleece), and a waterproof outer shell (your rain jacket and pants). This setup ensures you’re never too hot or too cold as you move through the changing landscapes of the classic Inca Trail 4-day itinerary.
One of the biggest reliefs for first-time trekkers is learning you don’t have to carry it all. Your tour company will provide a duffel bag for your main equipment—like your sleeping bag and spare clothes—which the incredible porters carry for you. Your only job is to manage a light daypack (20-30 liters is perfect). This small backpack is for everything you’ll need between campsites: your water, snacks, sunscreen, camera, and that crucial rain jacket. It’s the key to staying comfortable and self-sufficient on the trail.
Critical Essentials You Can’t Forget
While your full packing list will have more items, a few are absolutely critical for your safety and access. Before you zip up your bags, double-check for these five essentials:
- Broken-in Hiking Boots: Your single most important item. Blisters can ruin a trek, so make sure your waterproof boots are well-worn and comfortable, not brand new.
- Your Original Passport: You CANNOT enter the trail without it. Photocopies are not accepted at the official checkpoints, so keep the real one safe and accessible in your daypack.
- High-Quality Rain Gear: A waterproof jacket and pants are non-negotiable. A cheap poncho won’t cut it during a sustained Andean downpour.
- Reusable Water Bottle or Bladder: Hydration is key to managing the altitude and enjoying the hike. A 2-liter capacity is ideal.
- A Comfortable Daypack: The bag you’ll be wearing for hours each day. Make sure it fits you well and has supportive hip and chest straps.
With your gear sorted and your bag strategically packed, you’re on the final step before turning this dream into a reality.
From Dream to Trailhead: Your Final 5-Step Checklist
The Inca Trail to Machu Picchu is no longer just a picture on a screen; it’s a real adventure you now know how to plan, step-by-step. You’ve gone from being a curious dreamer to an informed planner, ready to trade “someday” for a departure date.
With a little advance planning, this epic journey is within your reach. Here is your final checklist for success:
- Book your tour 8-10 months out.
- Book flights and schedule 2-3 acclimatization days in Cusco.
- Start your physical training 3 months out.
- Gather your gear and break in your boots.
- Pack your sense of adventure!
You now have the blueprint. Every stone on that ancient path represents a step you are now equipped to take. The mountains are waiting. Your pilgrimage is ready to begin.